Graphics
Painterly/Non-photorealistic Rendering
This was a project for Cornell’s Computer Graphics Practicum course. The goal was to create a stylistic, real-time post-processing effect for Unity which results in an impressionist-inspired, painterly scene.
Our effect pipeline is detailed below:
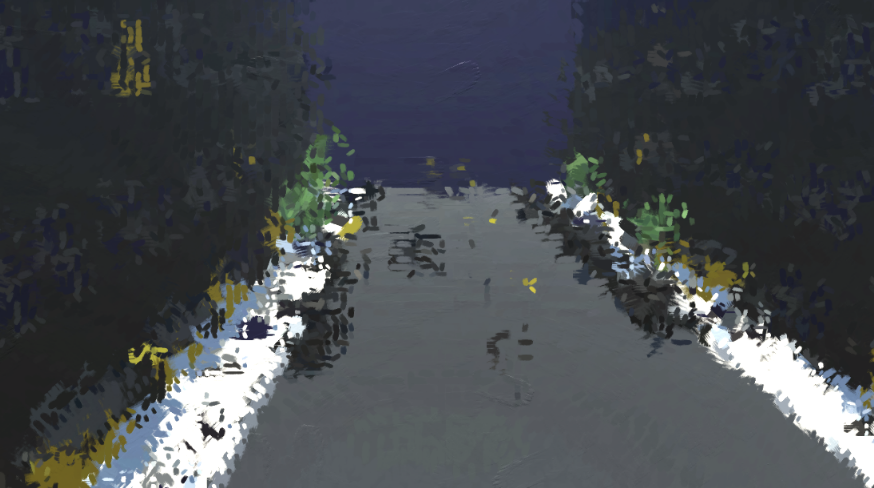
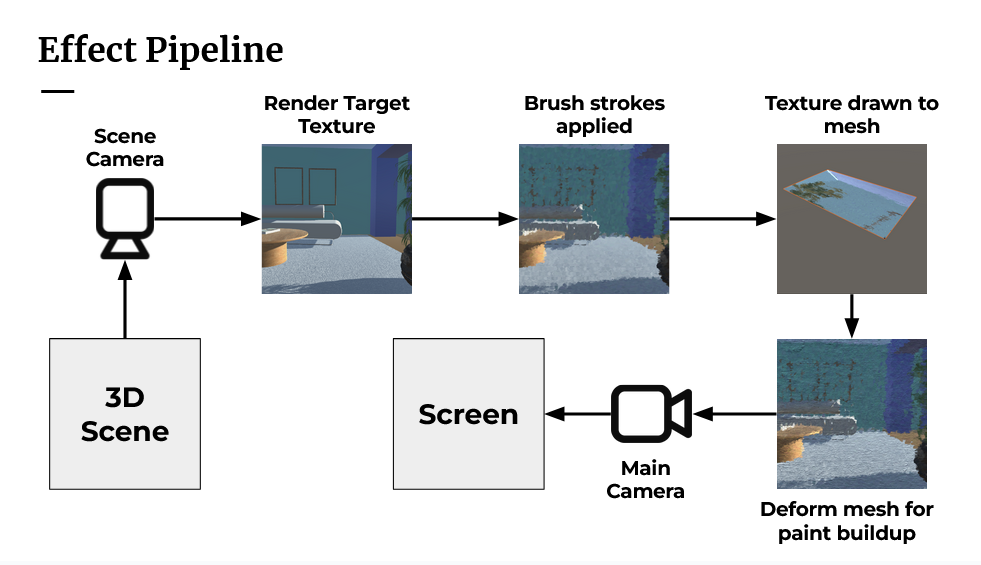 Basically, we take in a render texture from Unity and process it a bit to find things like areas of high/low detail. We then create color and heightmap textures by applying brush strokes based on our earlier processing (we tend to apply smaller brush strokes in higher density in high detail areas, and brush strokes attempt to follow the “contours” or gradient of the image). We then apply our color texture to a plane in front of the camera and deform it according to our heightmap texture. This allows us to use the built-in lighting systems in Unity and customize our scene greatly (for example, we can set up a museum scene with lights and occluders that move around in that scene while the “painting” on the wall has its own full, moving scene).
My responsibilities for this project included writing the majority of the brush stroke processing, placement, and orientation logic, as well as optimization of the pipeline (our early attempts were VERY slow, and I was able to eek out a 10x speedup). Much of this speedup was in downscaling intermediary textures (we are only drawing so many brush strokes, after all) and better handling CPU-GPU memory management.
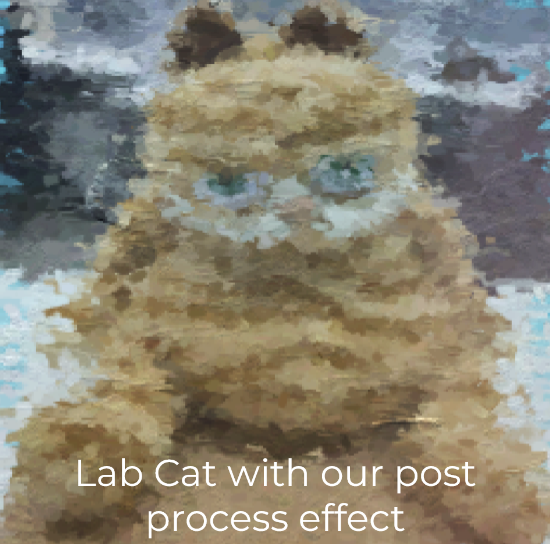
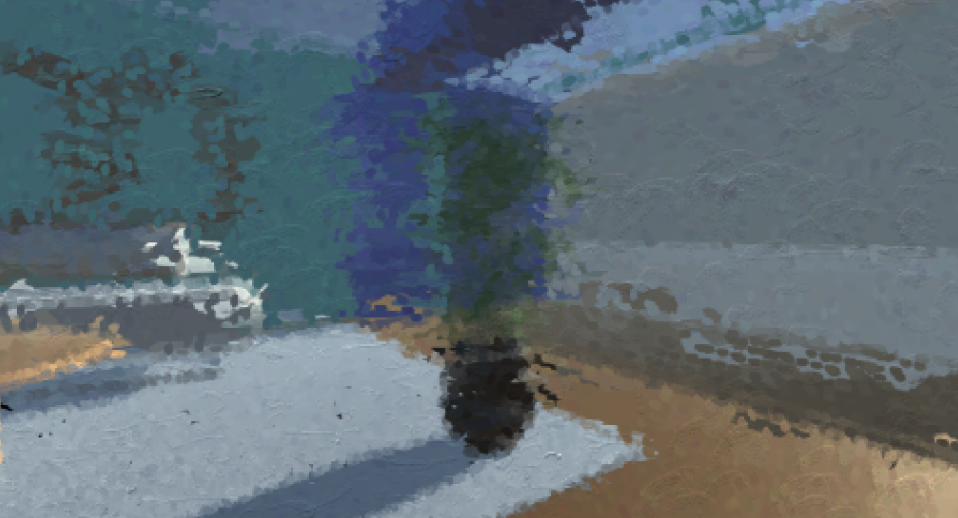
Here are some images demonstrating our effect:
Cell/Toon shaders
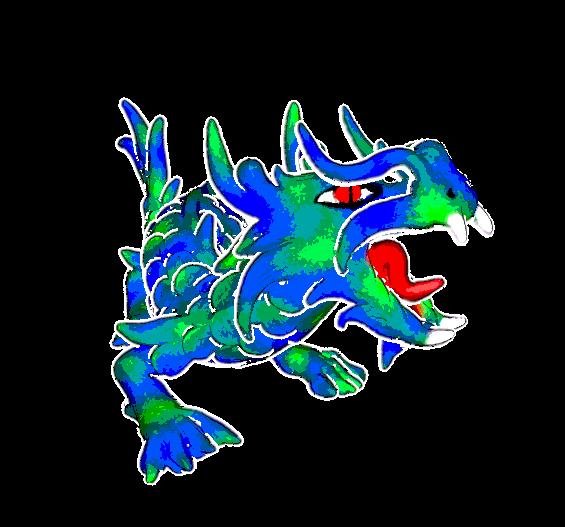
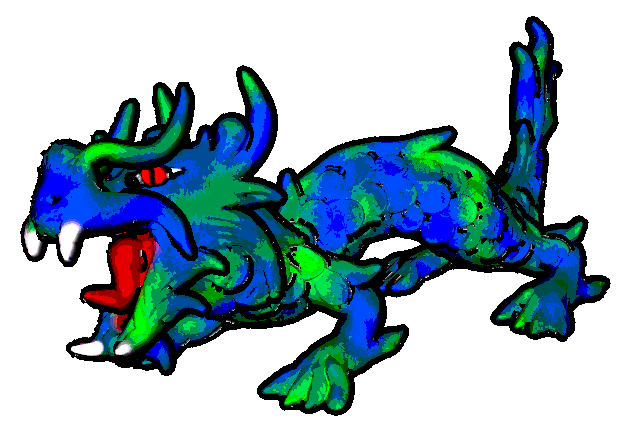
This was for a project for Cornell’s Introduction to Computer Graphics course. This was part of a group project, though much of my responsibility for the project was in writing shaders to stylize the game assets. I ended up going with a cell/toon shading approach which outlines the characters and quantizes their colors to emulate a cartoonish aesthetic. These are somewhat difficult to notice in the final product, so here are isolated screenshots below using the Stanford Asian Dragon model. This project was coded in TypeScript (with a Cornell package called Anigraph), though the shaders were coded in GLSL.
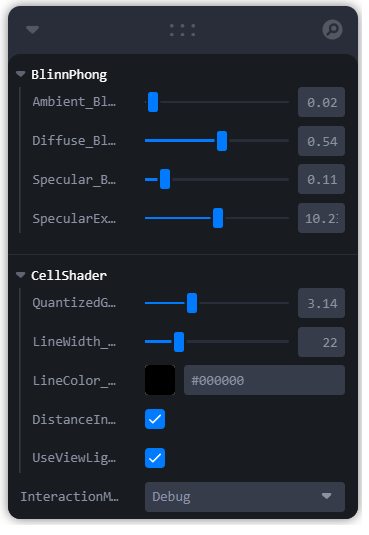
You can interact with the final project on this page, but I would instead suggest that you view this page as to focus on my contributions to the project. I advise fiddling with the sliders on the right; if you want to replicate the look above, start with parameters similar to these:
If you like shaders and want to look at the ones I wrote for this, you can look here. Please note that this was my first experience writing shaders and there is a lot I would change if I were to revisit this project (both with my actual code and the process of toon/cell shading as a whole).
Raytracing and Refraction
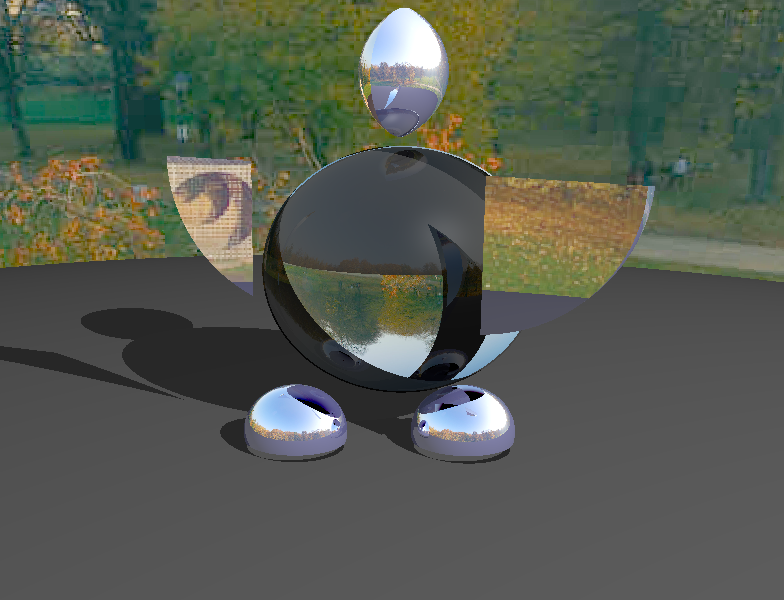
This was another project for Cornell’s Introduction to Computer Graphics course. This was a raytracing project and nearly the entire raytracing and rendering functionality was built in our code using Python and Numpy. I worked with a partner on this project and while we both put together the basic raytracing functionality, I coded all of the refraction-related aspects of the project (i.e., the glass-like quality of the spheres). This project was an honorable mention for one of the top projects produced by that class and has some very interesting technical aspects.